Unboxing
Initial inspection and unpacking procedures for the HiveRadar EDC.
Before Unpacking
Inspect the Shipping Box:
- Check for visible damage to the outer packaging
- Look for signs of impact, crushing, or water damage
- If signigicant damage is present, take photos of any damage before opening
- Ensure all potential damage is documented before unpacking and contact your reseller
Location:
- Unbox in the location where you plan to deploy the EDC
- Ensure adequate space for maneuvering (approximately 6ft × 6ft clear area)
- Find a flat, stable surface for unpacking
Unpacking Procedure
Step 1: Remove Outer Packaging
The EDC arrives in a cardboard box with side handles and reinforcement. The package is heavy - two-person handling is strongly recommended.
Recommended Unboxing Steps:
- Remove any straps, tape, or protective materials around the box
- Locate "Open Here" icons, cut the tape and open the flaps outward between the icons
- Flip the box upside down while holding the flaps to the sides
- Lift the box upward to remove it from the EDC
- Flip the EDC to be right side up
- Move the protective foam away from the unit - retain this foam as it can be reused for additional protection alonside the EDC Protective Carry Case
- Remove the plastic bag from the EDC - retain this bag as it can be reused for shipping or storage
Inspect the Case Exterior:
- Check for any shipping damage such as dents, scratches, or damage to the case
- Verify wheels and handle are intact
Step 2: Remove Shipping Restraints
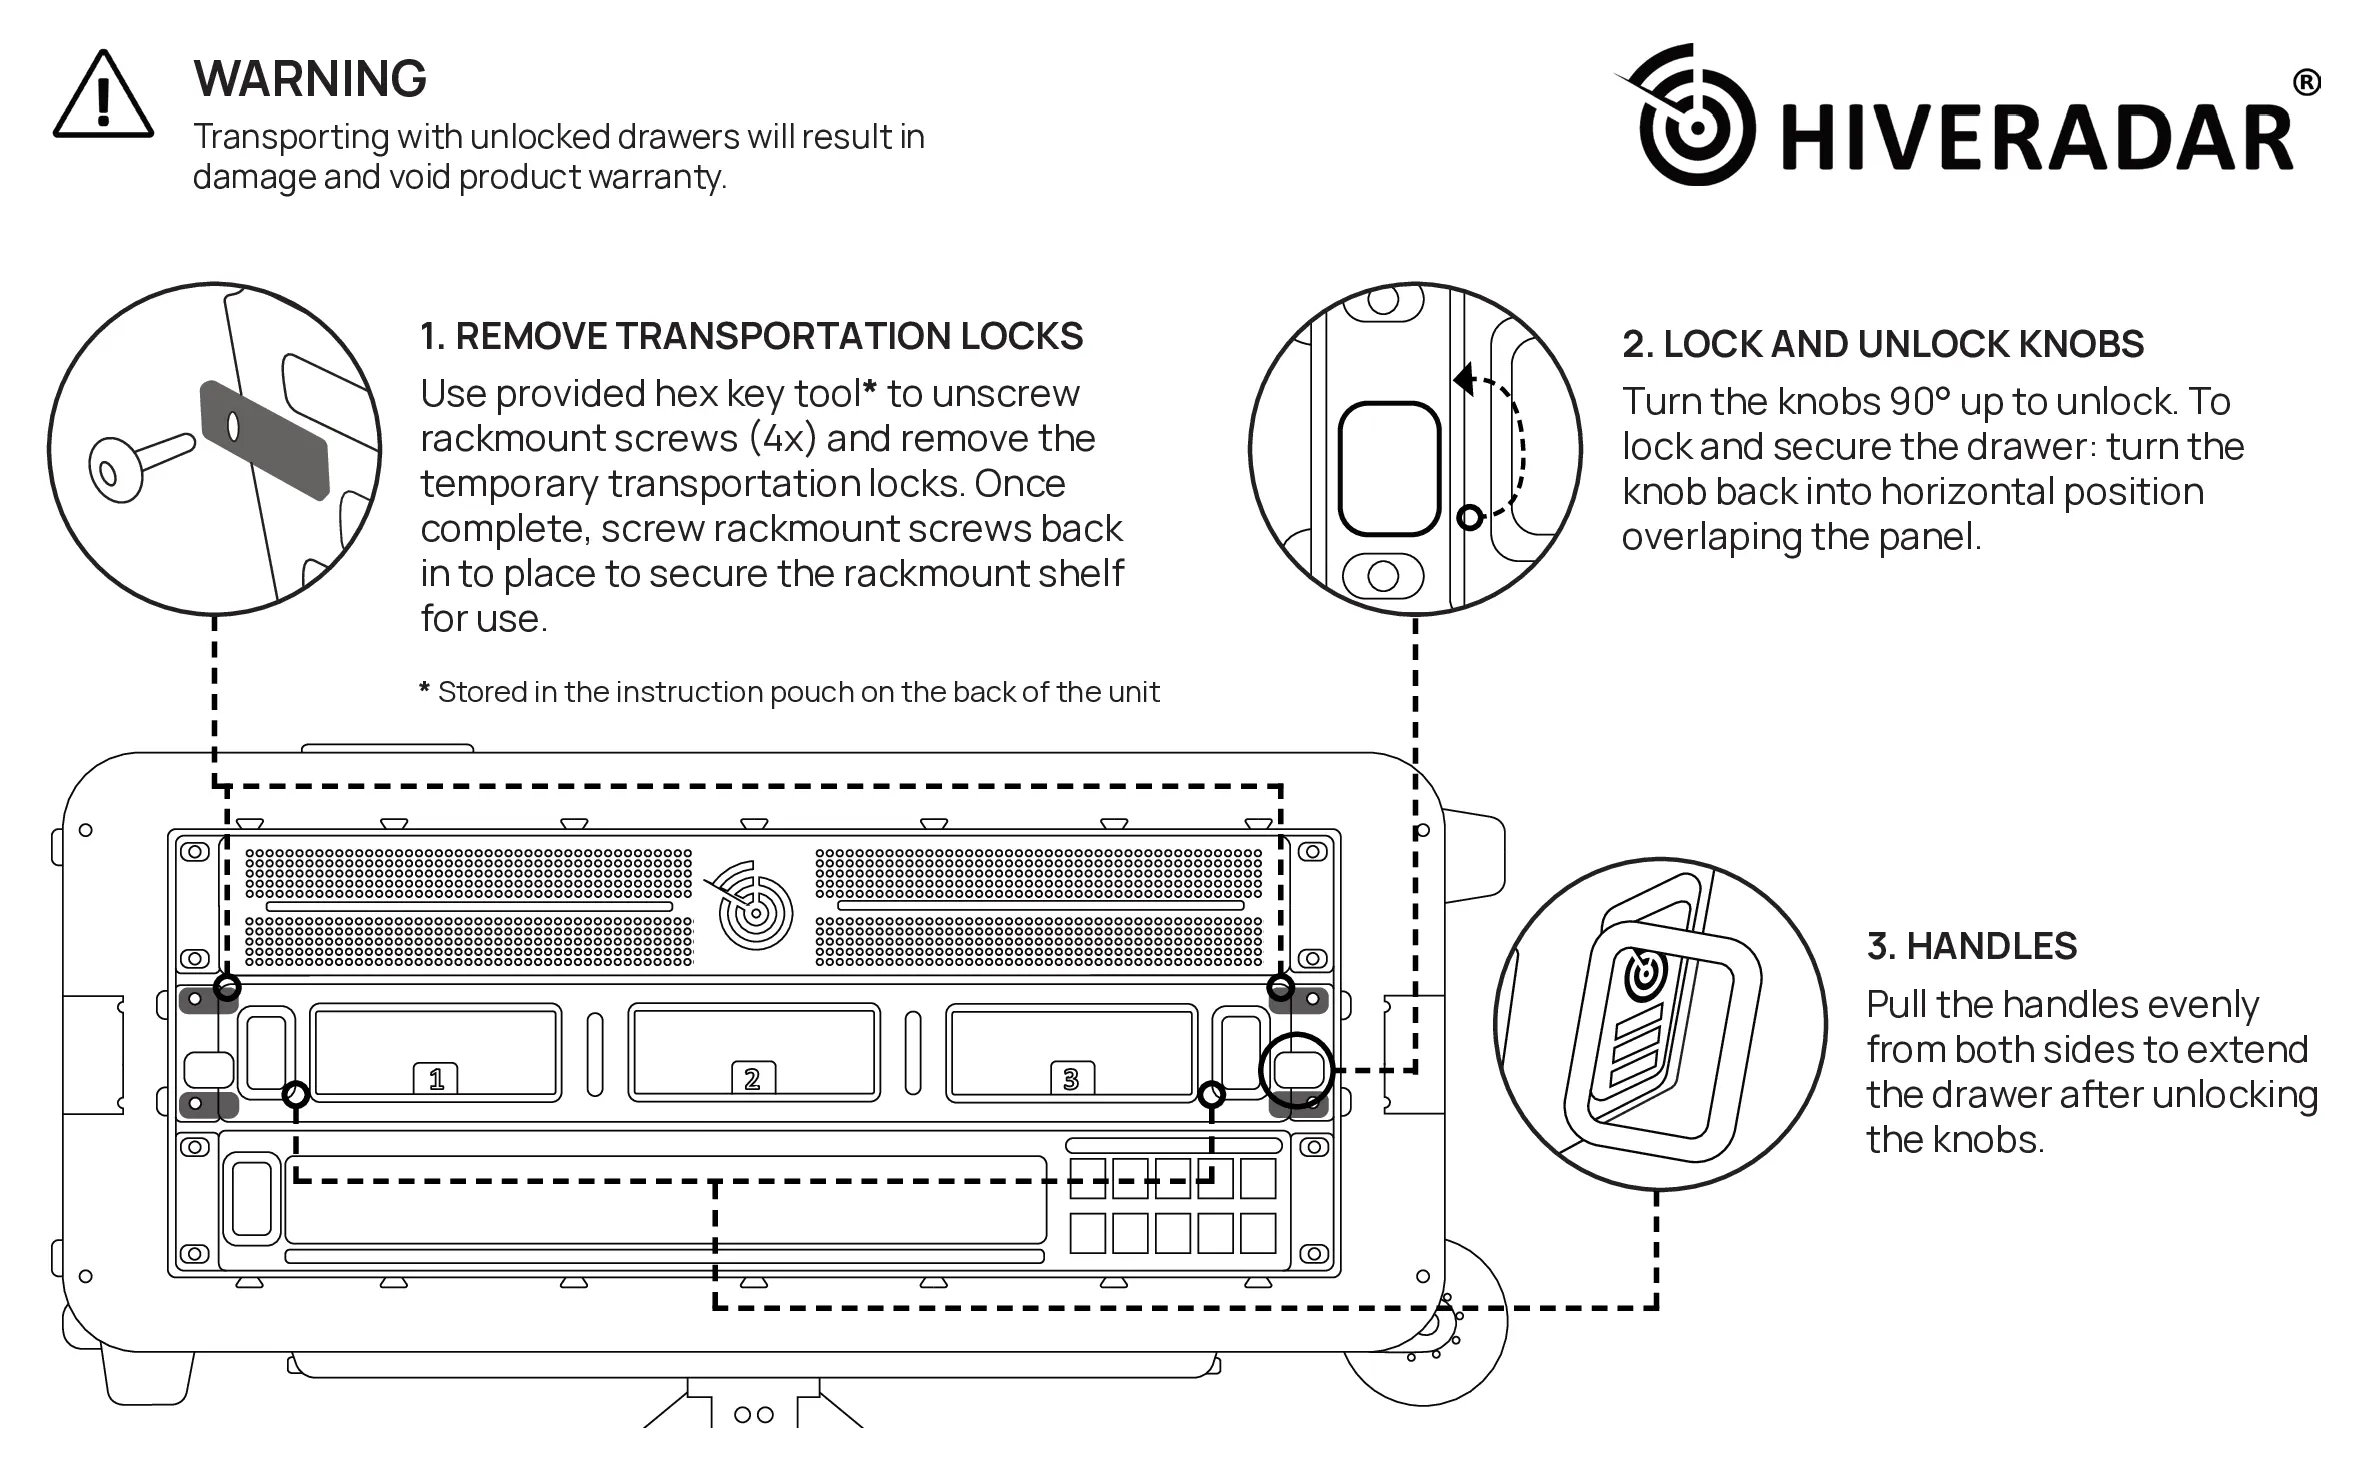
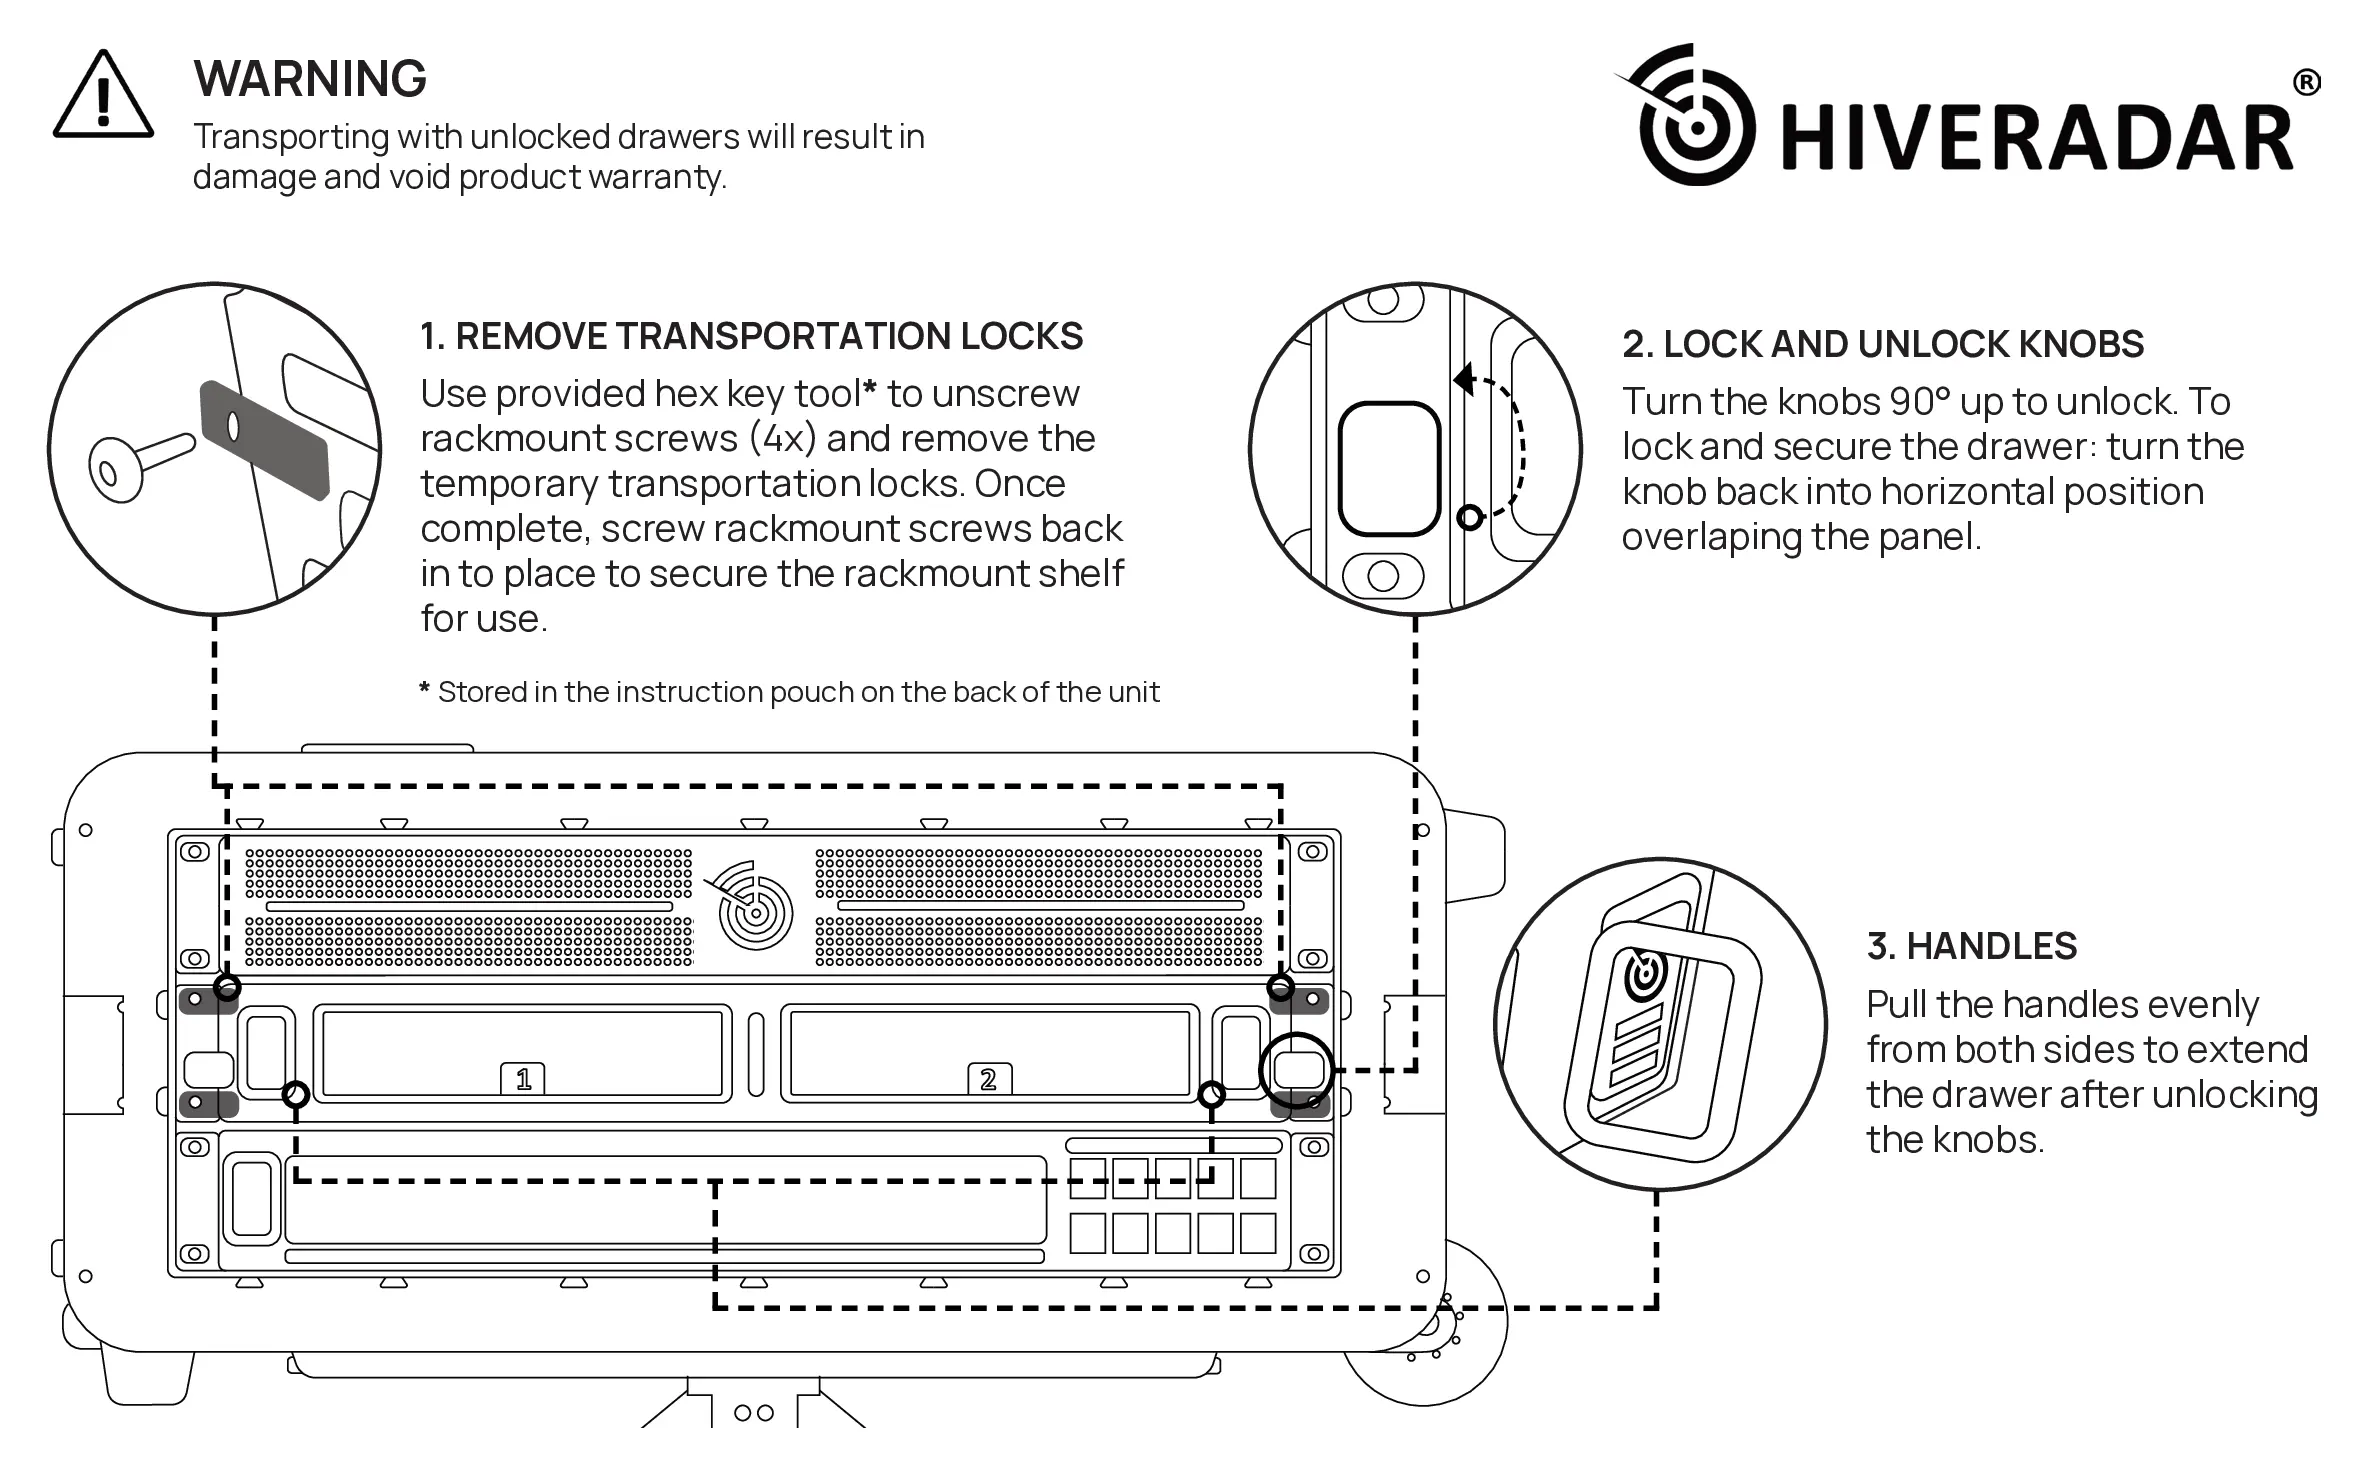
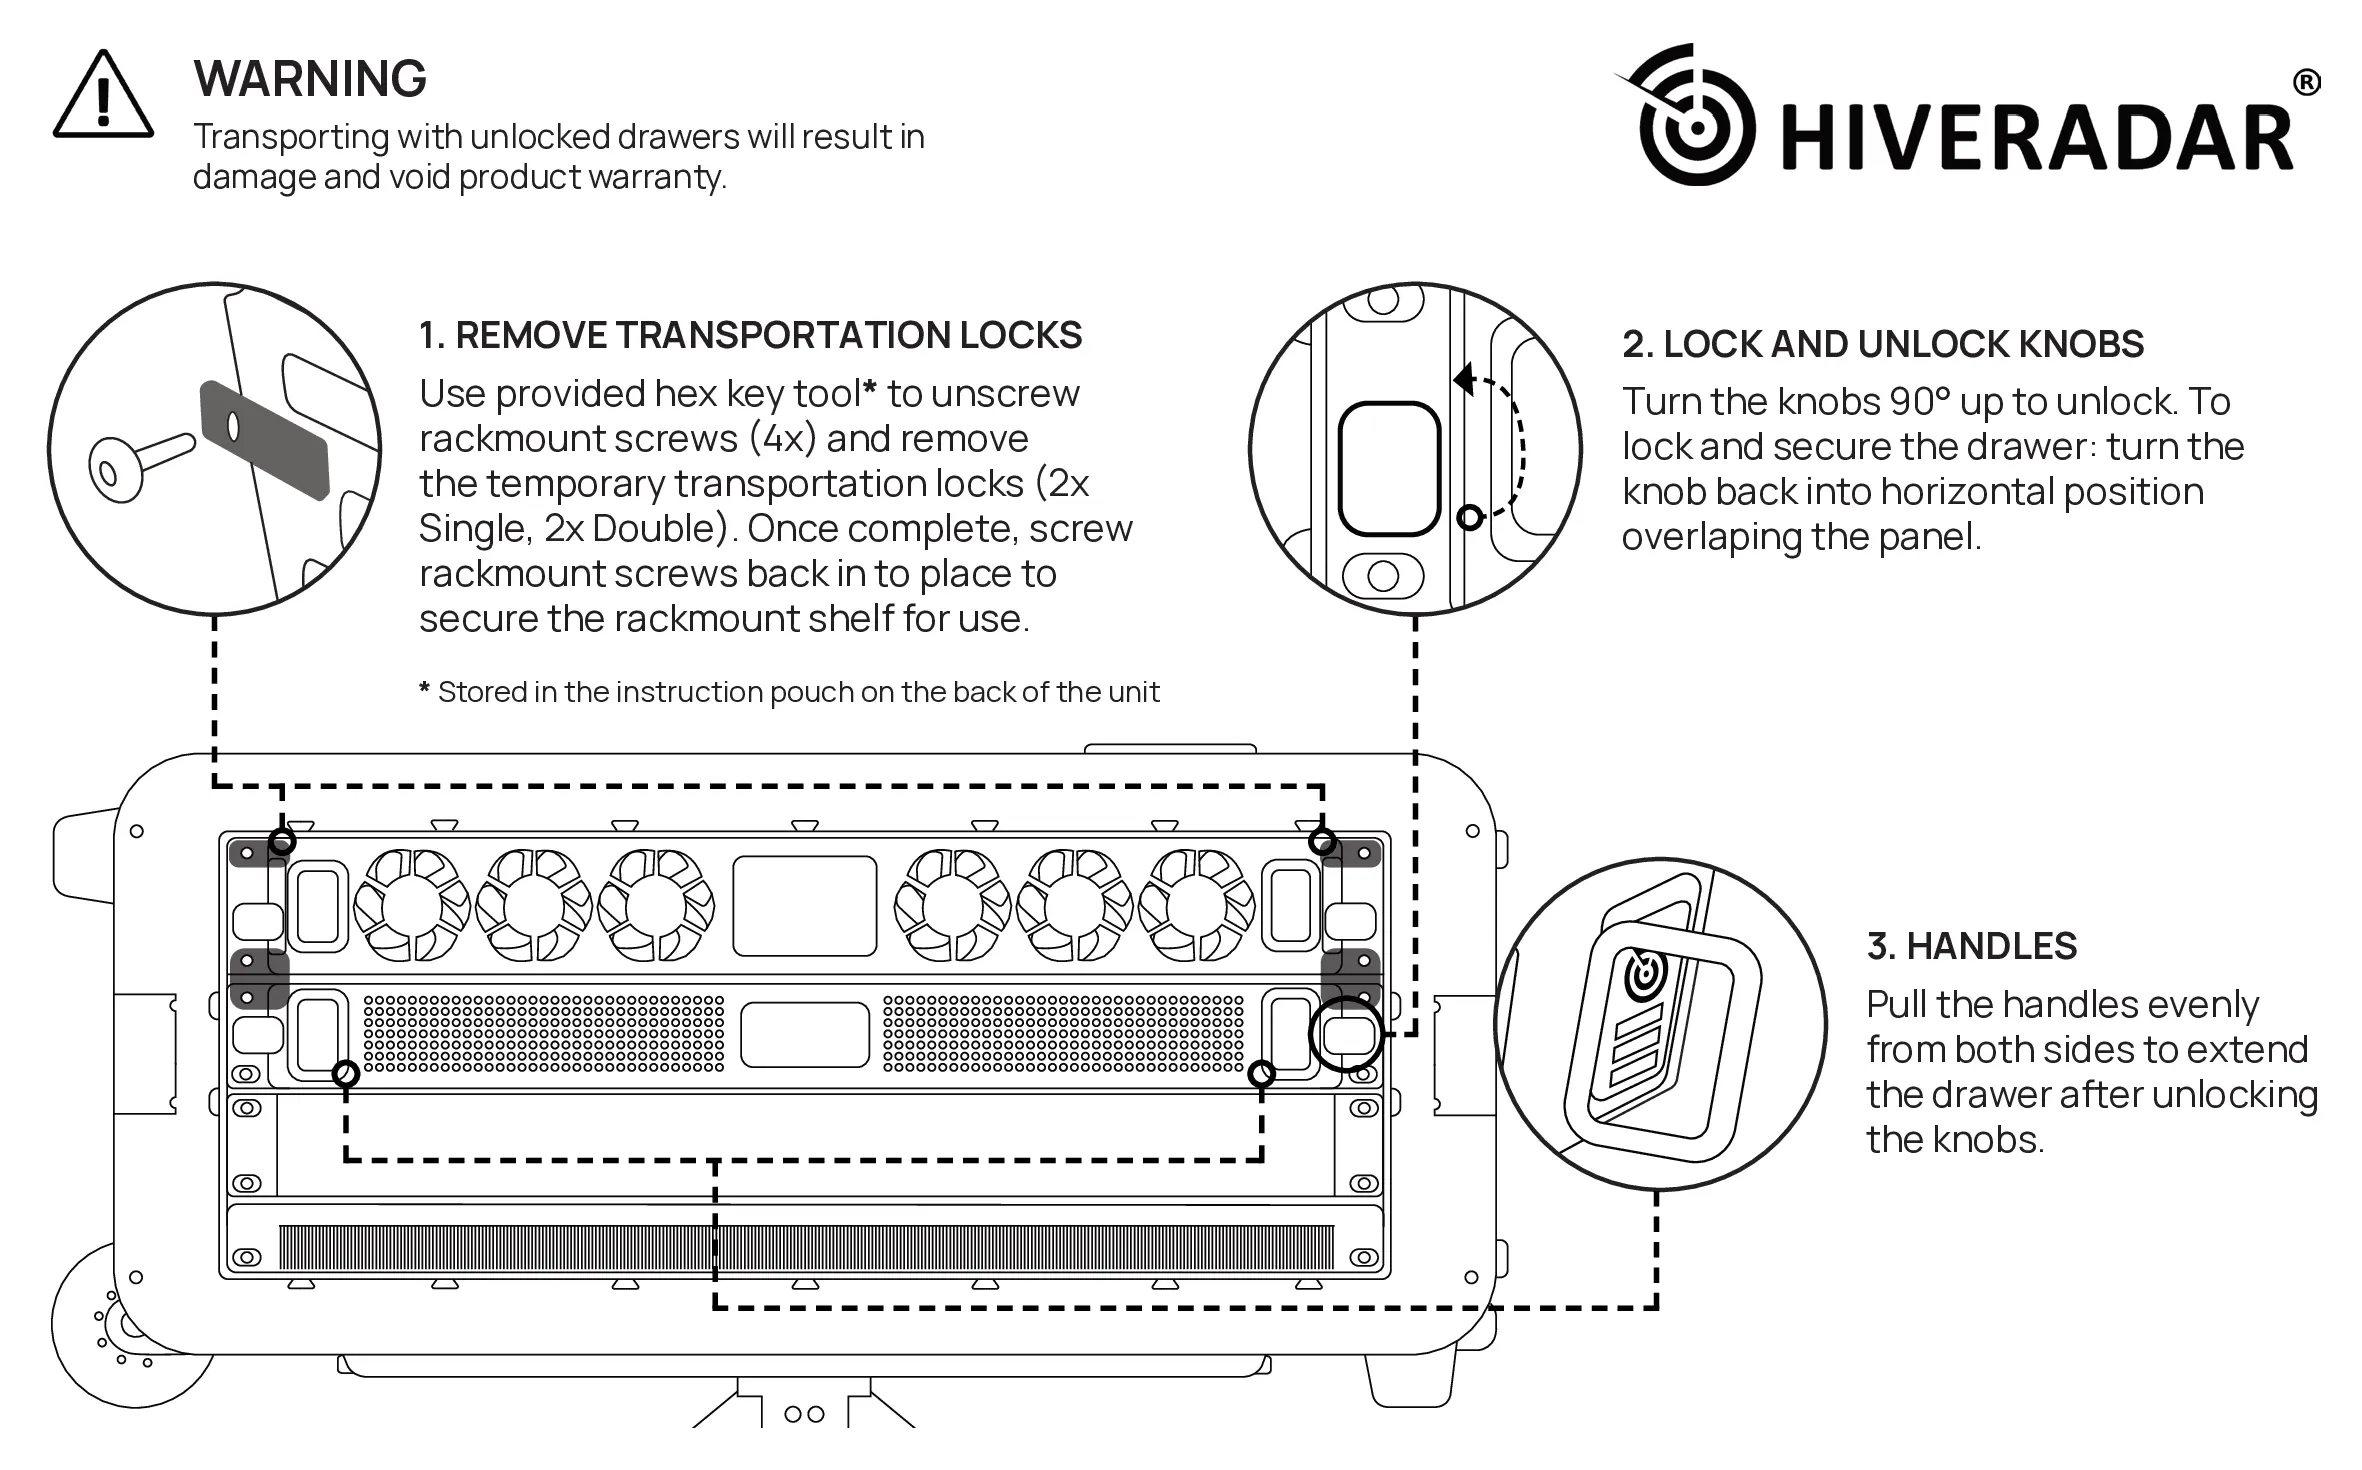
The EDC may include shipping restraints, a.k.a. the transportation locks, to prevent components movement during transport, such as on the drawers on the back and rack at the front.
- Check for Transportation Locks
- Shipping locks may be located securing the rear drawers to prevent sliding during transport
- Using the included 4mm hex key (The tool is stored in front manual sleeve placed under lid, in older batches this will be the same tool that is typically stored in the upper storage drawer. In newer batches, it will be a seperate hex tool in the sleeve) as per diagram provided below, unscrew the rack screw holding the transportation lock
- Once transportation lock has been removed, screw the rack screw back in to hold the rack in place
- Optionally retain the transportation locks if shipping the kit long distances using couriers
Front Manual for NUC Model
Front Manual for HR-01 Model
Back Manual
Step 3: Initial Inspection
Exterior Inspection:
- Wheels move freely
- Lids are secure and latches function correctly
- No visible damage to case exterior
- Test the pull out handle to ensure it isn't too loose or restricted
Before Opening the Case:
- Ensure the EDC is on a stable surface
- Position with EDC being placed in horizontal position
- Clear any obstacles around the case
Opening the Case Gor the First Time
Step 1: Unlock the Latches
-
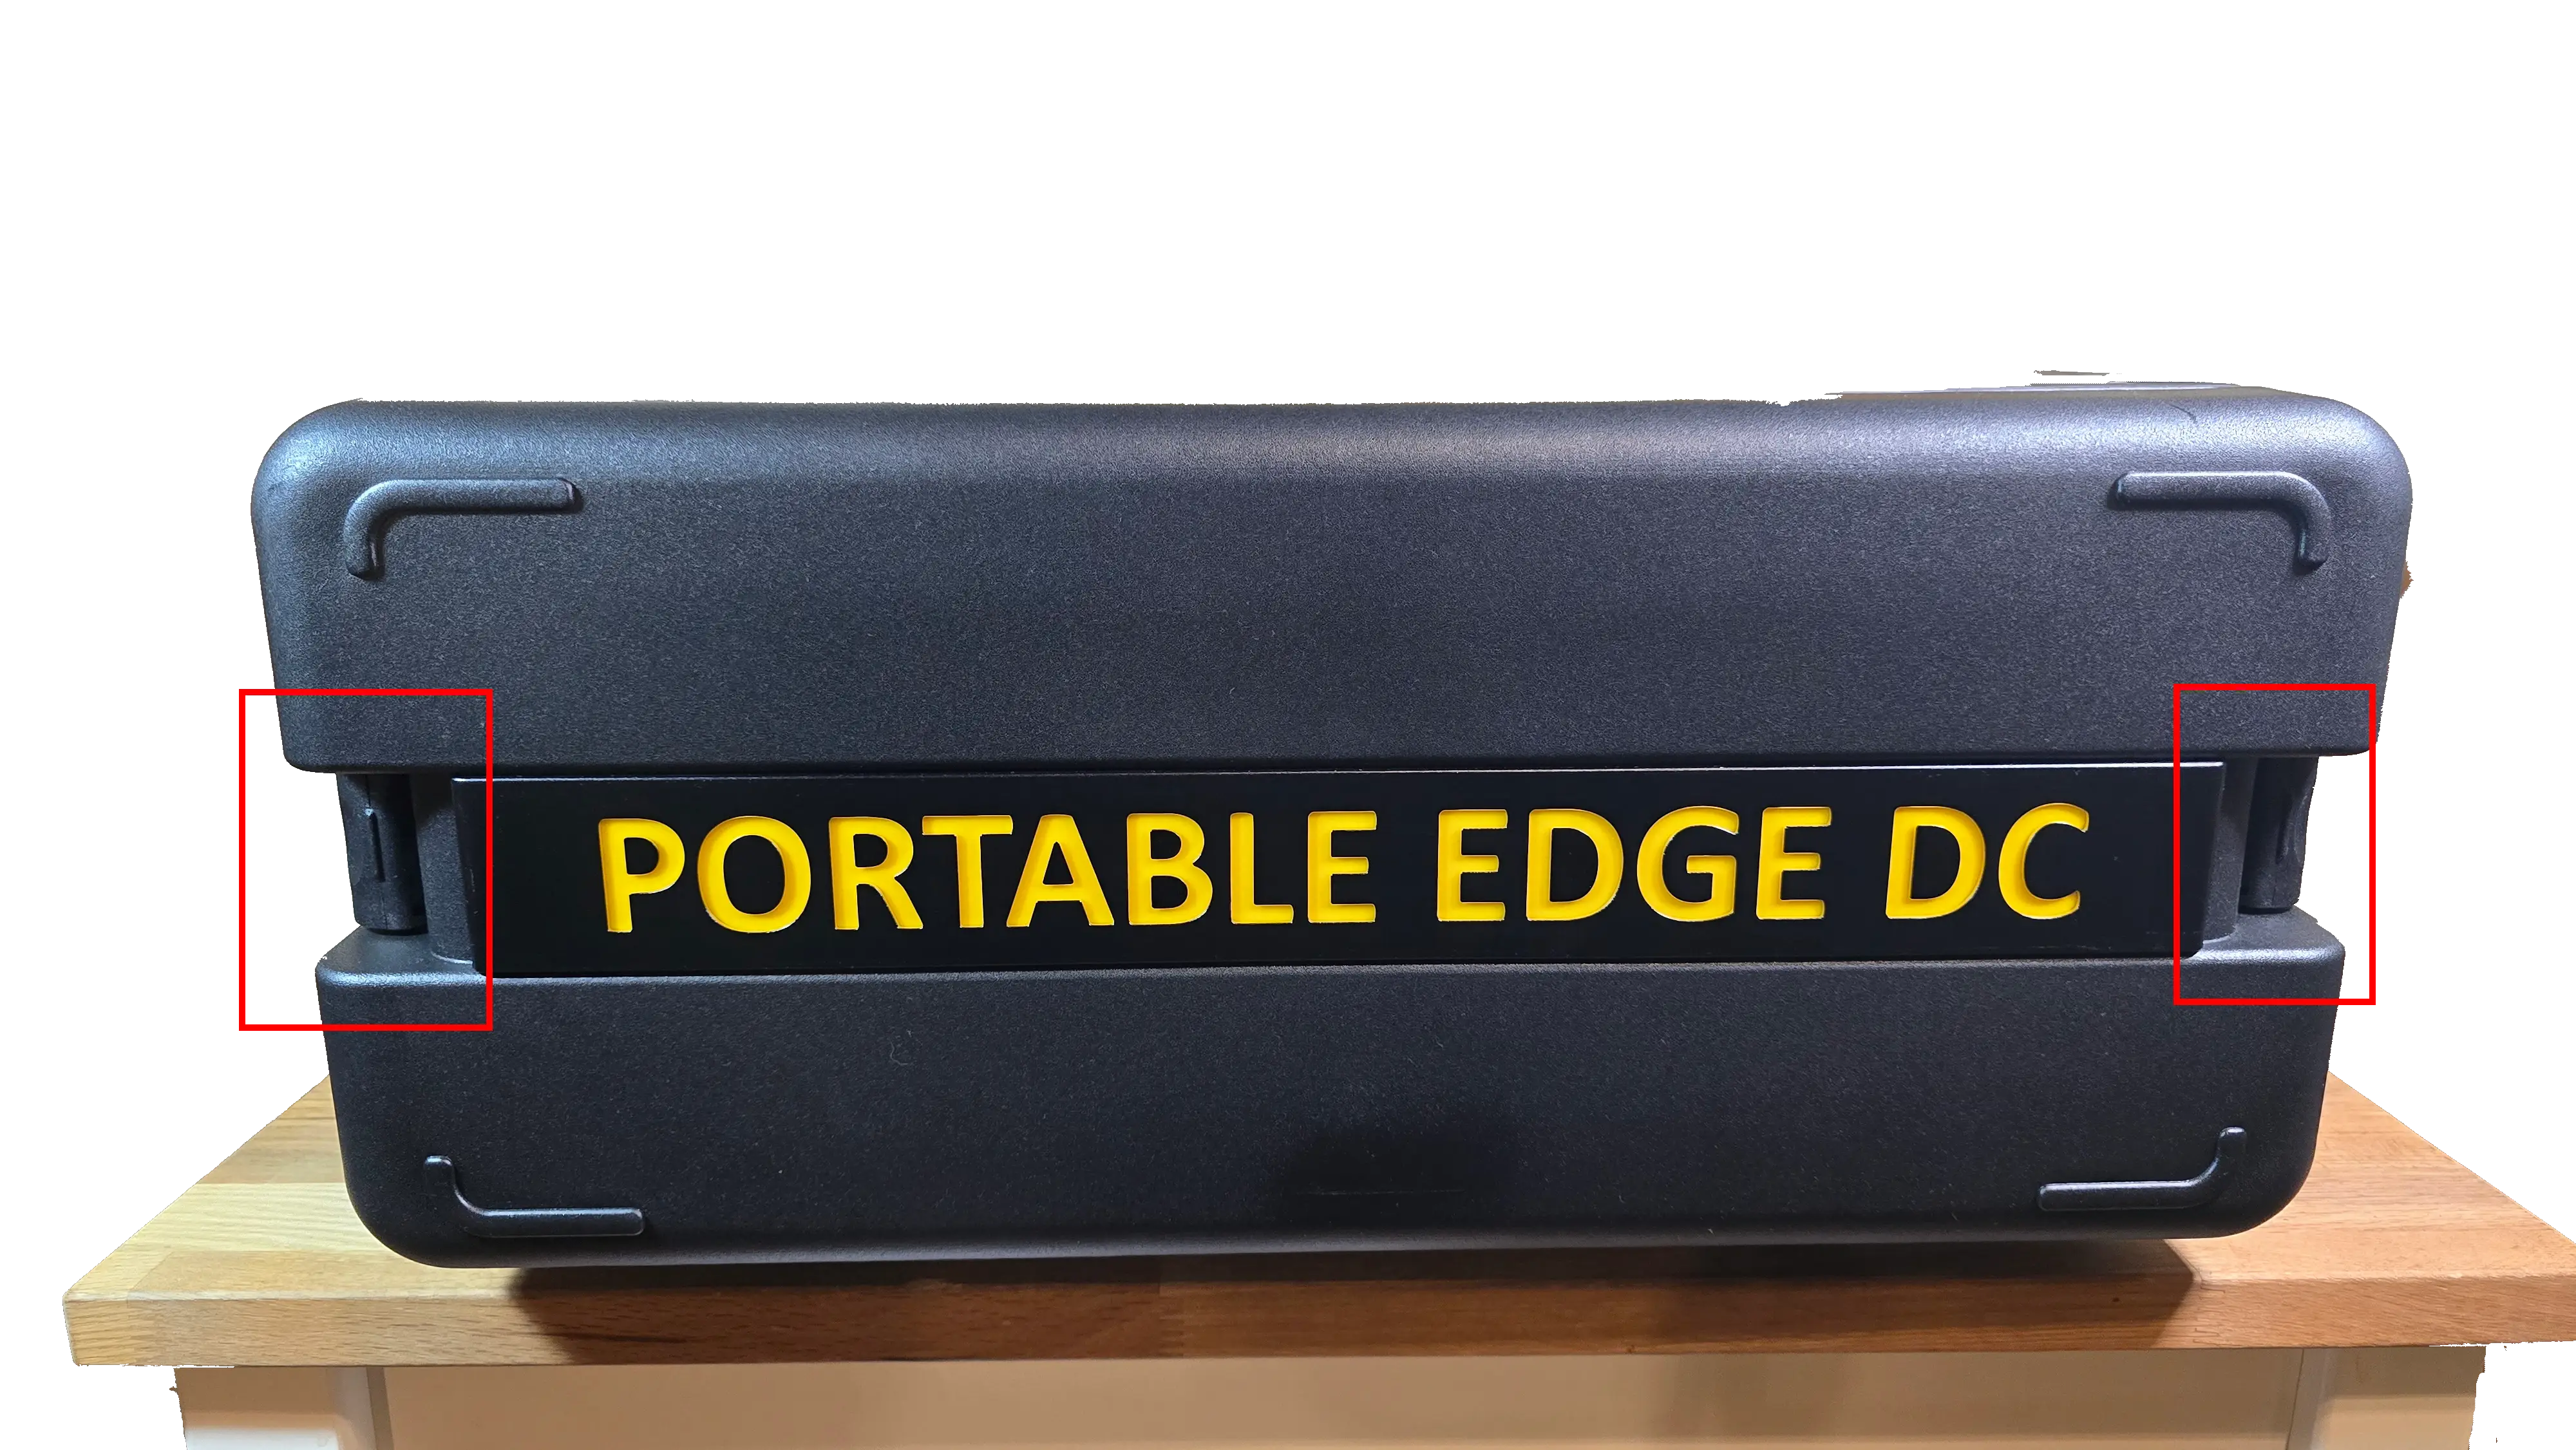
Locate the Case Latches
- They are located on top and bottom sides on the edge of the lids
-
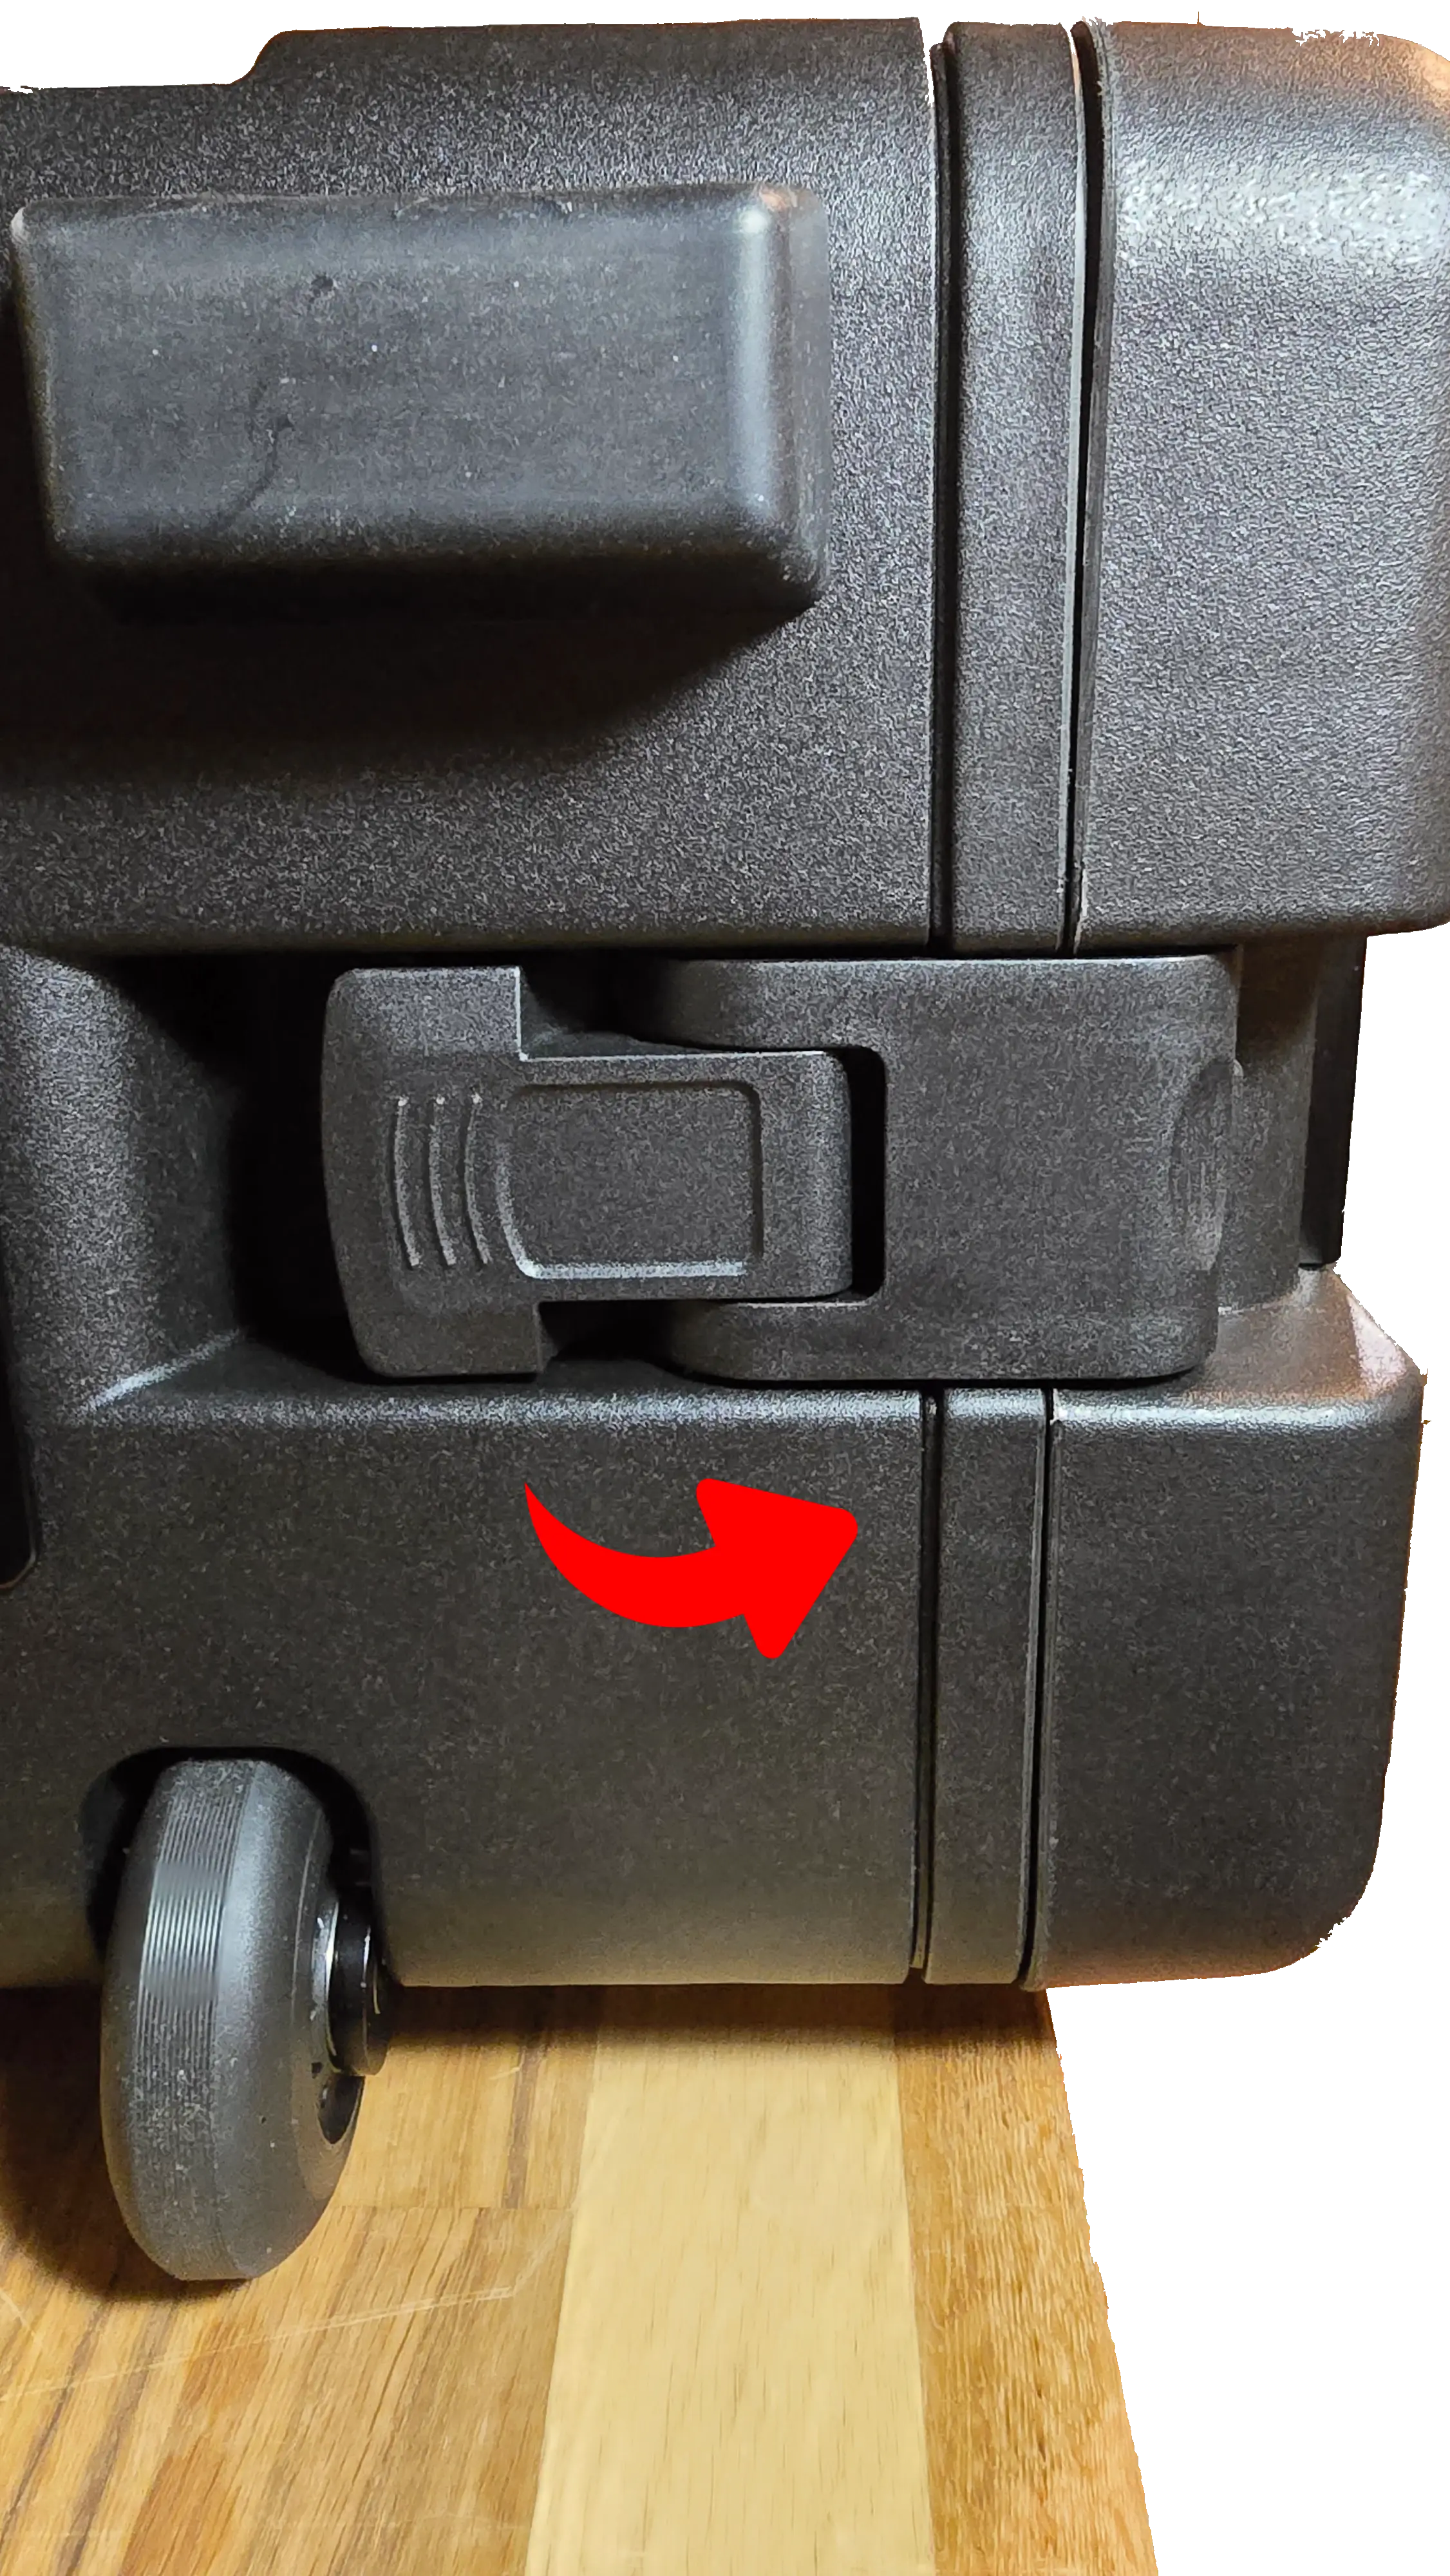
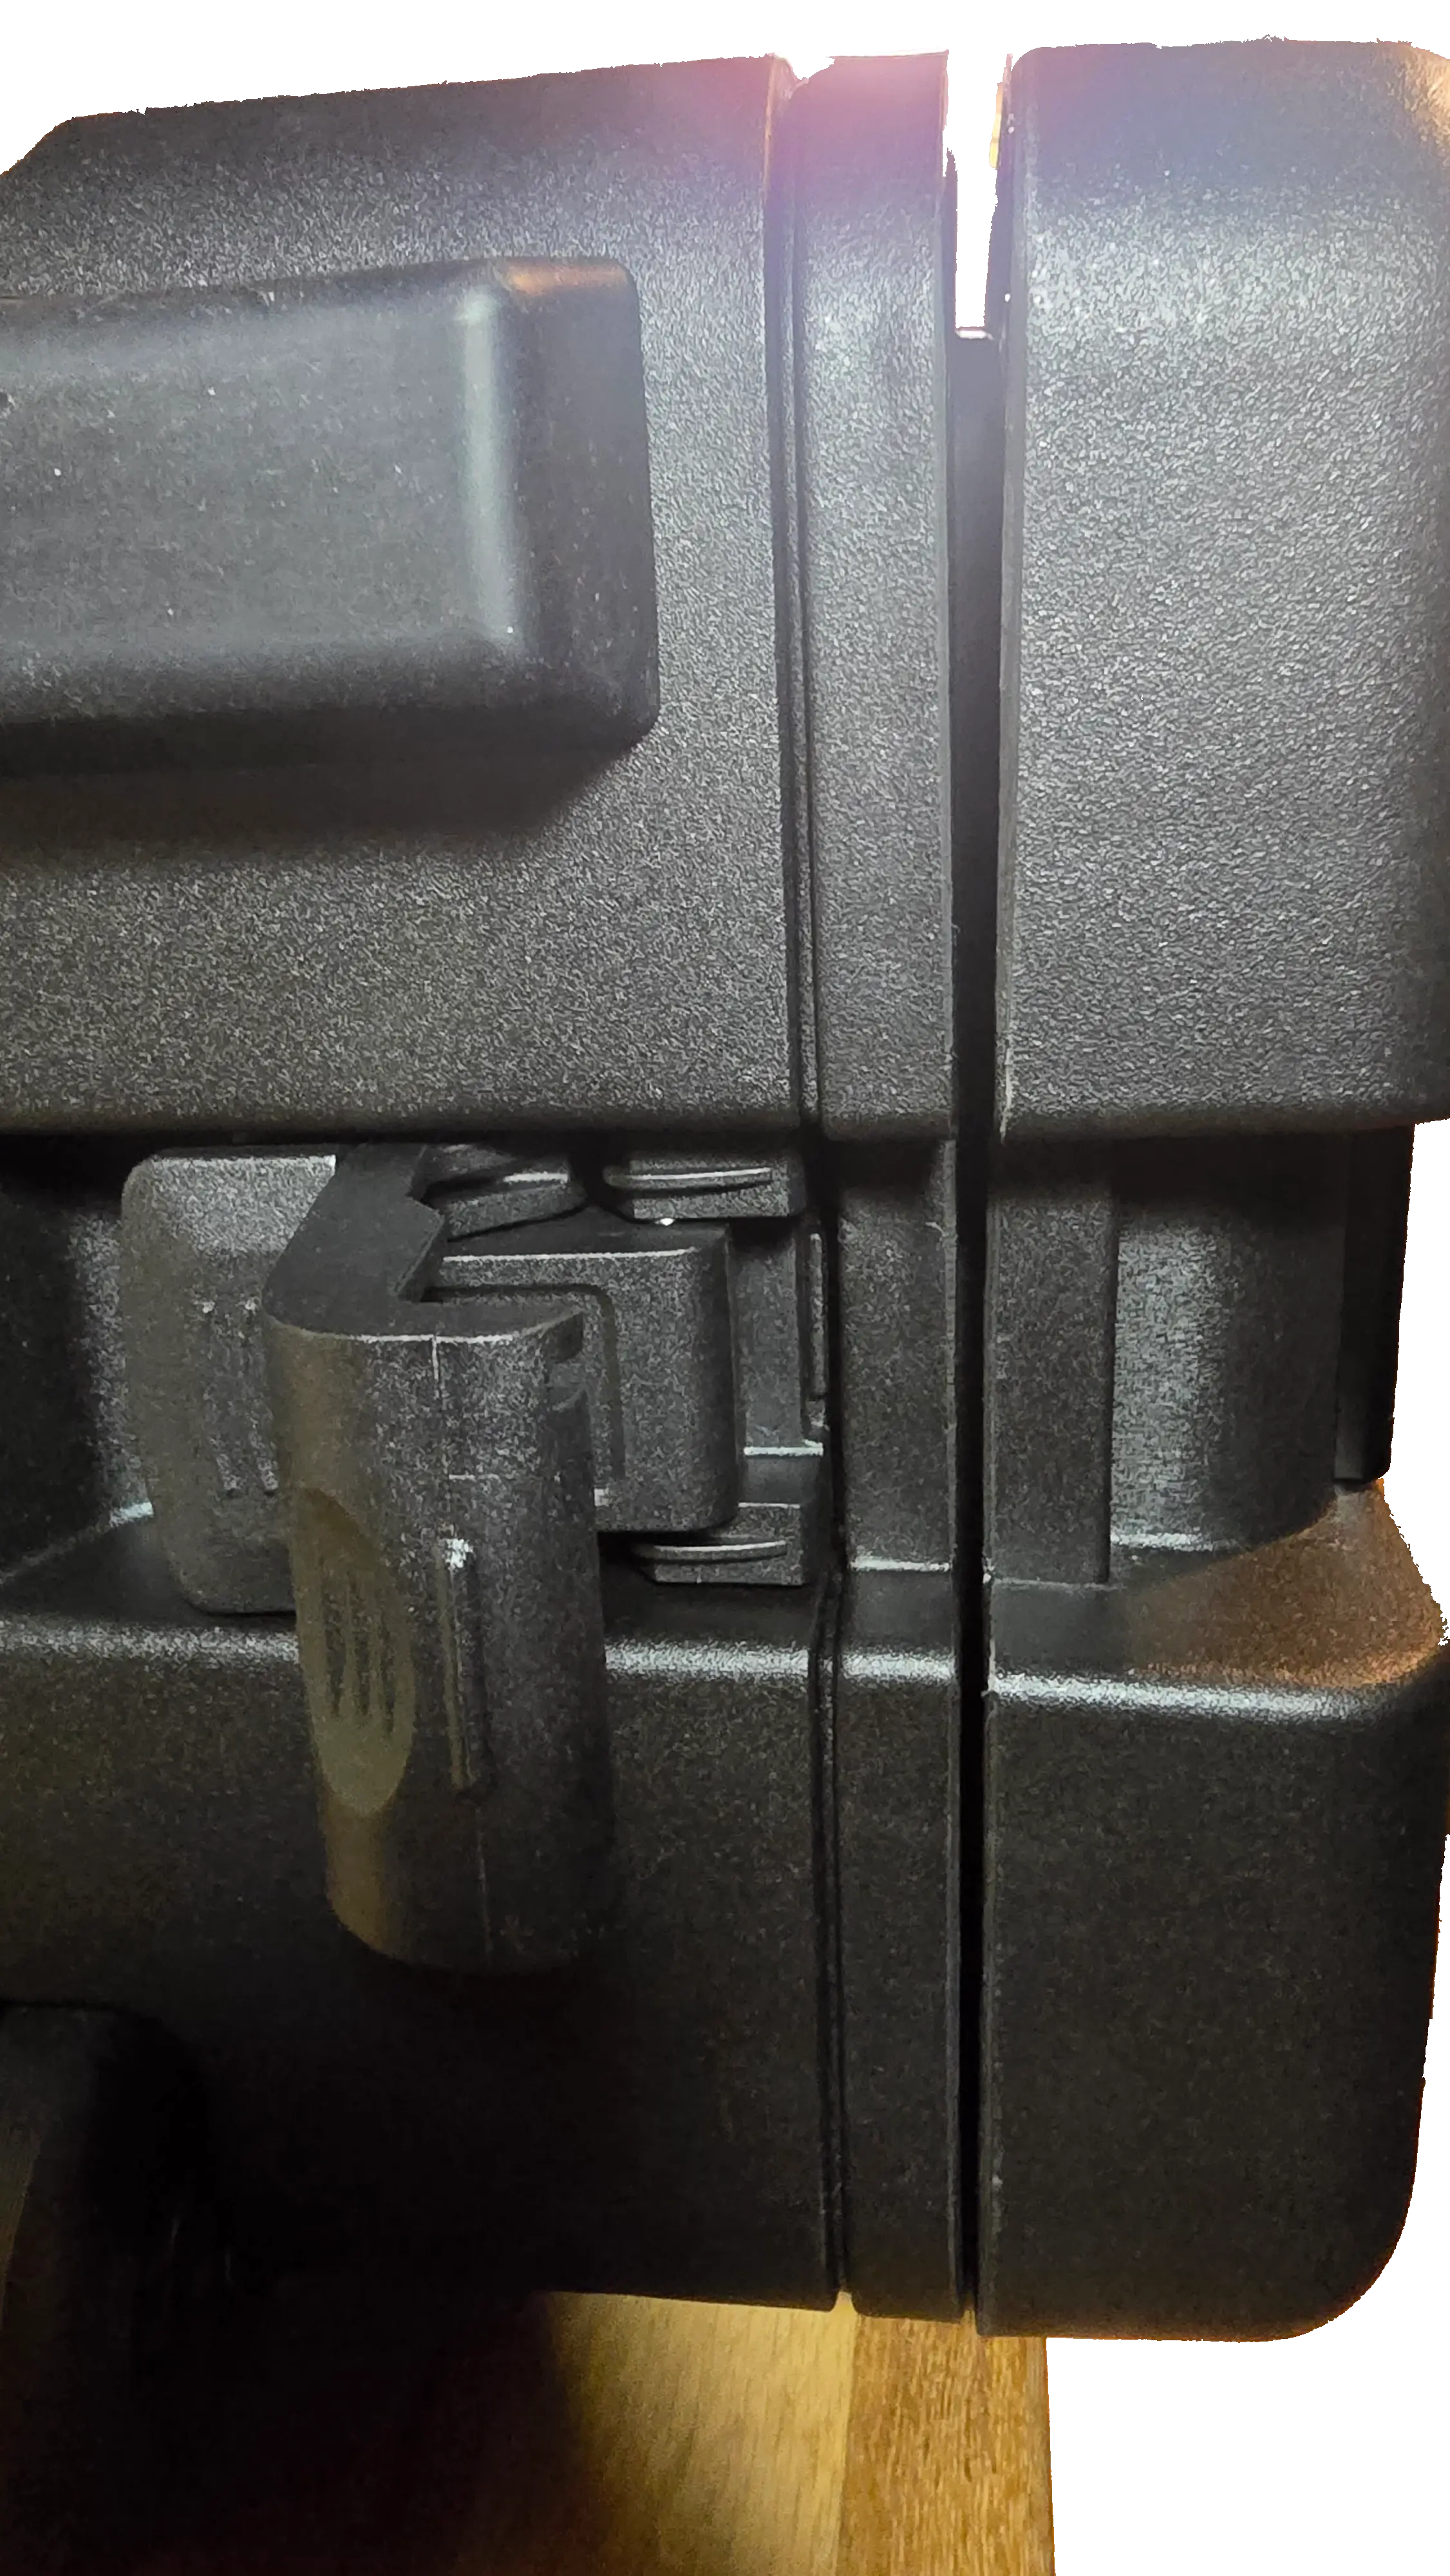
Unlock and Open Latches
- For standard latches, release the locking mechanism
-
Support the Lid as You Open It
- Lids may have some weight
- Open slowly and deliberately
- Always hold/apply pressure to the lid to prevent it from abruptly falling when opening it
- Foam pads and instruction manual sleeves are under lids and loose, they may fall out when opening the lid
Step 2: Inspect Internal Components
-
Verify All Components are Present and Secure
- Compute nodes in compute drawer (if pre-installed by your reseller)
- Switch visible and secure
- PDU mounted in rear panel
- Cables properly routed and connected
-
Check for Shipping Damage Inside
- Look for loose components
- Check for disconnected cables
- Ensure the drawers open smoothly and without obstruction
- Ensure the drawer locks aren't damage and work properly
- Verify nothing has shifted during transport
-
Locate the Accessory Kit Pouch
- Located in a storage drawer
- Includes the power cable, 2× Ethernet cables, welcome letter, Switch documentation with QR codes, velcro straps, and extra velcro drawer straps.
- If you have ordered a kit with Mako 5600 Gateway, you will also find the mounting bracket adaptor and a PoE splitter.
Issues Found During Inspection
If you discover damage or missing items:
-
Document the Issue
- Take clear photographs
- Note serial number and model (on label at rear panel below PDU)
- List specific damage or missing items
-
Contact Your Reseller Immediately
- Report issues before powering on the unit
- Provide documentation and photos
- Request replacement or repair instructions
-
Do Not Power On Damaged Equipment
- If internal components are damaged or loose
- If cables are disconnected or damaged
- Wait for reseller guidance
What's Next?
After Successful Inspection:
👉 Lid Operation - Learn to operate the EDC lids safely
👉 Leg Deployment - Set up for stable operation